Blending & Global Adjustments
Overlap & Content Size
After completing the scan, VIOSO automatically calculates the overlap zones where projections from different projectors intersect. This calculation is crucial for eliminating visible seams or inconsistencies in the projected image.
The result of this calculation can be viewed after blending calculation (button content info) or when editing the result (button More ... and then Calculate optimal content size):

Blending and Color
Blending is another critical aspect managed by VIOSO. The software employs sophisticated algorithms to seamlessly blend the overlapping areas of the projection. It adjusts the intensity and color in these regions to create a unified visual experience, reducing the need for manual adjustments.
After the scan, the softedge blending is calculated automatically based on the projector image overlaps, which are also determined automatically (see above),
Nevertheless, it can be useful to influence the soft edge parameters calculated in this way. The button Color & Blending leads to the adjsutment of blending and content related masking:

Softedge Adjustments
The automatically calculated parameters for soft-edge blending are usually suitable for most applications and fit from scratch. In any case they provides a solid foundation for making fine adjustments. Proceed as follows:
Soft-edge blending should be optimized based on the content being displayed.
Prepare representative frames from the content to be projected. The internal player in VIOSO can handle typical image formats and videos in H.264 and H.265 formats. Put these files in the Player and adjust the softedge while playback.
Proceed carefully and use the arrow keys on the keyboard to adjust the sliders for the best results.
Adjustment Tools

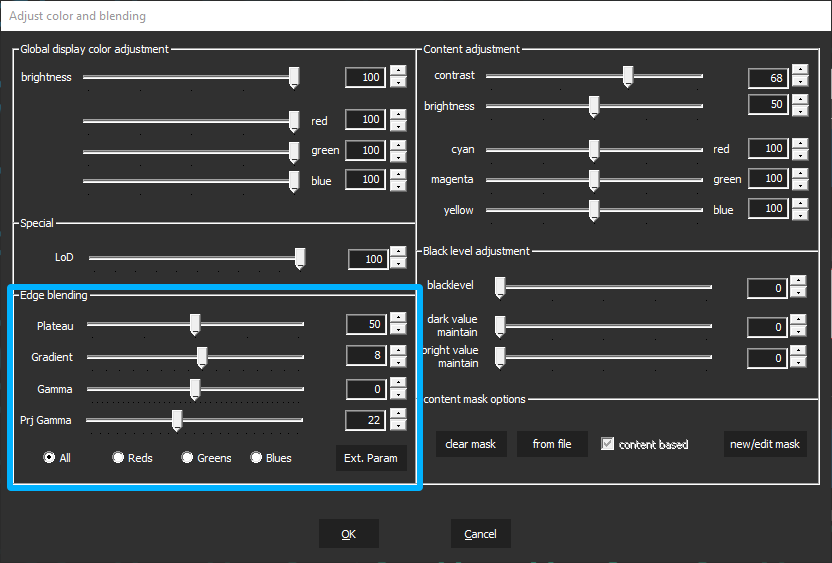
Plateau: Represents the intensity in the blending zone
Gradient: Size of the blending gradient applied to each overlapping edge
Gamma: Adjusts the brightness of the overlapping area
Prj Gamma: Adjusts the brightness of the nooverlapping area (to compensate differences in projector gamma levels)
Color channels: Selecting
Allapplies these parameters to all color channels. For more fine-tuned results you can selectReds,GreensandBlues, thus adjusting the blend per color channel individually.
All blending parameters are applied to all softedges within a single display compound at the same time.
Extended Adjustment tools
The above described blending parameters result in a fixed blending pattern. For even more control of the blend generation, klick ext. Param and it leads to a dialog that offers an alternative way to design the softedge blending pattern.
To switch from the previous (parametric) to the extended (spline-based) softedge pattern, select Spline based in the dropdown:

Black Point: Defines the lowest starting point of the blending gradient
White Point: Defines the highest starting point of the blending gradient
Mid Point: Adjusts the brightness in the center of the curve describing the blending gradient
Curvature: Adjusts the shape of the curve describing the blending gradient
Gamma: Adjusts the brightness of the overlapping area
Prj Gamma: Adjusts the brightness of the nooverlapping area (to compensate differences in projector gamma levels)
Color channels: Selecting
Allapplies these parameters to all color channels. For more fine-tuned results you can selectReds,GreensandBlues, thus adjusting the blend per color channel individually.
Switching between both blending modes is possible any time.
Content Masking
These masks are applied to the entire content. This means that the entire area of a compound covered by projection is the reference for such masks. Unlike projector masks, content masksare applied on the softedge blended result and deform according to the warping.

Clear mask: Clears any applied masks from the output processing
From file: Loads an image file (PNG or BMP) that acts as a mask. Black areas are maked, whereas white areas are see-through
New/Edit mask: Launches the tool to draw masks on-the-fly. Read more about the usage of this tool here: 3. Projector masking tools
Gamma: Adjusts the brightness of the overlapping area
Global Color Adjustment
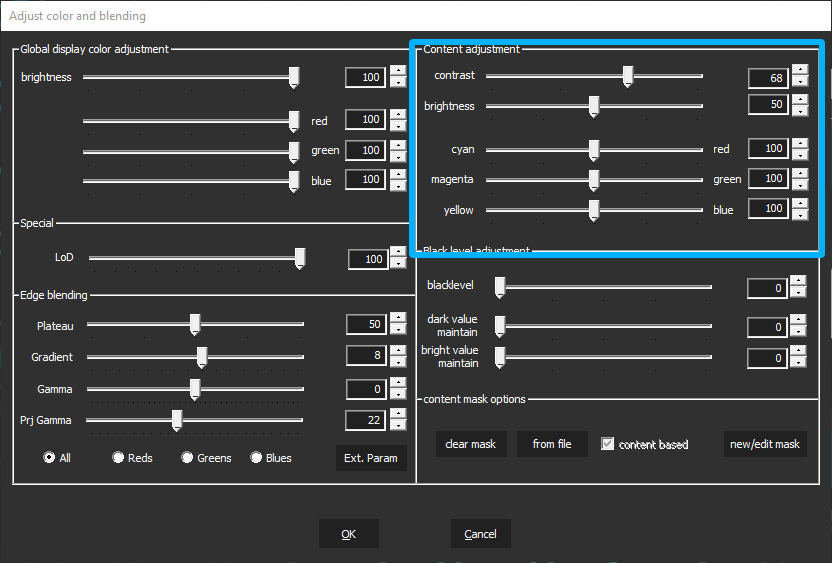
Here, the color balance for the entire content can be adjusted. This adjustment affects all projectors within a compound equally and can be controlled in real time using these sliders.

Content adjustment is another instance to tweak the output in contrast, brightness, cyan, magenta and yellow, to get the best result out of your projection.

Content adjustment settings are not expoted to other tools! They are only used in the internal player of VIOSO.
Last updated