> For the complete documentation index, see [llms.txt](https://docs.vioso.com/llms.txt). Markdown versions of documentation pages are available by appending `.md` to page URLs; this page is available as [Markdown](https://docs.vioso.com/preparation/projectors.md).
# Projectors
## Evaluating projectors for softedge blending
It is well known that projectors behave differently when they are used for multi-projection with softedge blending. The combination of factors like image matrix technique, optical lens, and projection surface has a significant impact on the quality of blended multi-projection.
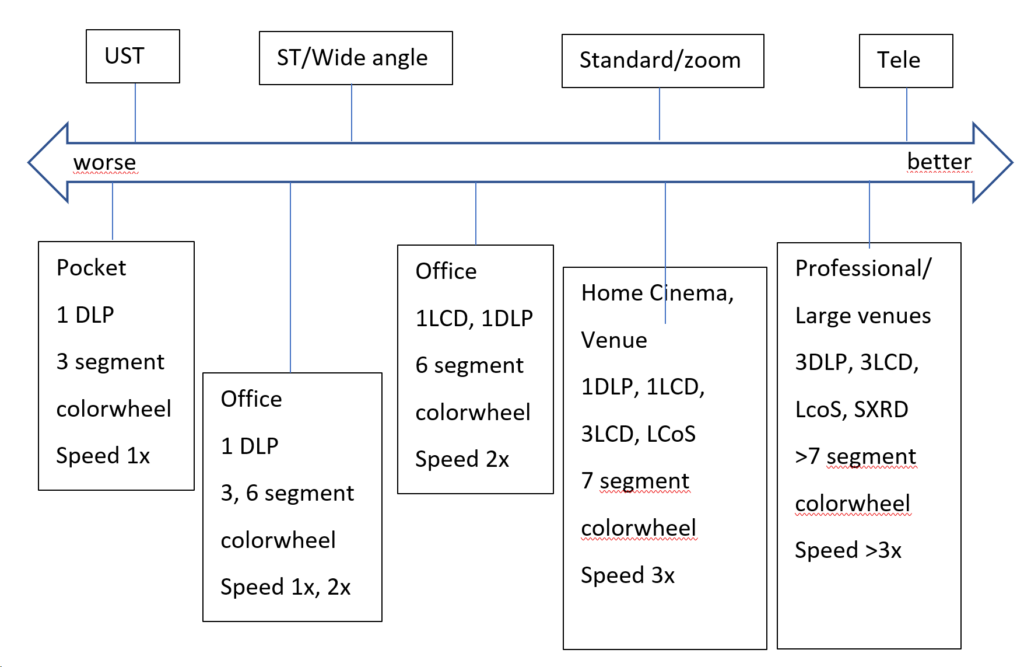
This diagram represents the common direction of the mentioned parameters and how they can influence softedge blending results. It is not considered to be a precise guide for projector type selection, but gives an understanding of how high you can expect a final result to be:
Ultra-Short-throw projectors (UST) or mirror lenses are usually the most problematic type of projectors in terms of blending. The problem lies mostly in uneven brightness distribution, and therefore non-uniform color shading across a single projector image. These projectors are designed to be used only on flat surfaces, so using them on curved surfaces such as domes, cylinders, or other shapes will cause significant problems such as: Soft-focus on projection edges, massive pixel distortions and size variety across projection image, and uneven brightness.
On the other hand, professional projectors can provide a superb image quality. Using better color-wheels that are specially designed for blending purposes (i.e. projectors for simulators) or triple LCD matrix or SXRD technology, providing an outstanding black-level together with convenient standard or telephoto lensing improving the final multi-projection result.
## Content and surface
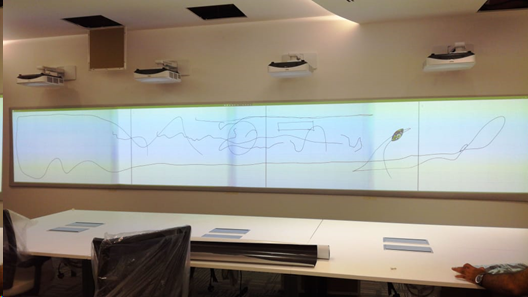
The Projection surface is very important. Note that black color from your projector is physically no projection and no light coming from the projector showing a black pixel. Thus, any color shade of the projection surface will effect as a colorfilter for the whole projection.
Ideally, the projection surface is designed for projection (projection screen, dome in-liner, projection foil or paint). It has to be reflective to increase the brightness and efficiency, this is called its “gain”. However, the surface should be matte--to avoid light spots and absolute reflections from the lamp of the projector. The Worst type of projection surface would be black polished glass, while the best result will be given on a matte white surface.
Content being displayed is often underestimated in terms of its capability to hide or identify limitations of the softedge blending. As a matter of fact, bright, colorful, and dynamic content is very forgiving. It will hide all imperfections and decrease the effect of low-quality blending. Solid colors, smooth gradients, and shades are usually the most difficult content as it highlights projection problems such as color mismatch of projectors, blending mask issues, brightness non-uniformity, etc.
*Consideration of the content to be displayed can help to configure optimal projection setup within given budget. Obviously, bright, vivid, and colorful projection can be carried out using a lower budget projector. But whiteboards or blue sky content (flight simulators) will be very demanding in terms of projector and blending quality.*
## Setting up projectors
* Make sure all of the parameters of the projection image are identical (brightness, contrast, gamma, color modes, etc.)
* Switch off any dynamic functions, such as dynamic gamma, dynamic brightness, etc.
* Choose preferred mode as „Video“ instead of „presentation“, „eco“, „game“, etc.
* Choose gamma around 2.4 (film mode).