2D Warp
After completing all scans, VIOSO computes the blending for the entire area that is covered by the projectors and not hadled with masks.
If a 3D Alignment has been done, this result is prewarped already.
If not, the content has to be aligned on a 2D way - like applying warping to a single projector.
Realtime Warping
Warping is executed in realtime, on one compound - regardless of the number of clients participating. Start the warping by selecting a target and click Edit:

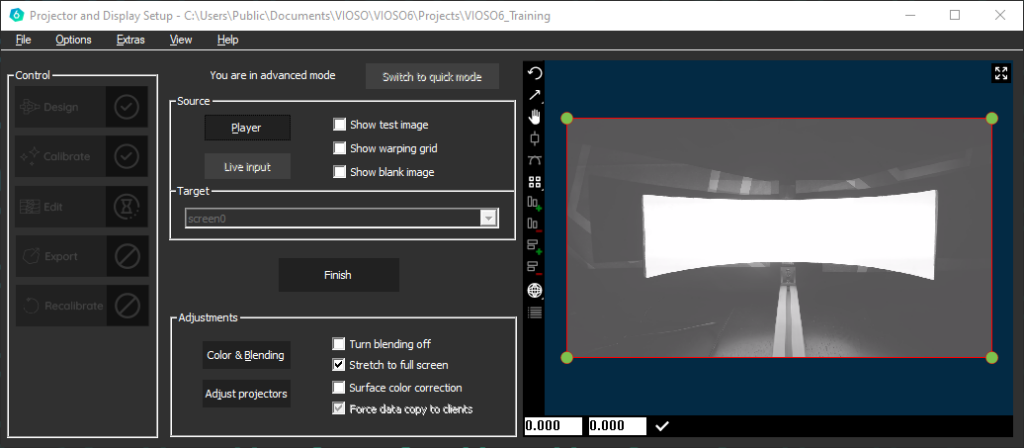
In 2D mode, the mapping of content is handled by warping the outlines of a suitable testpattern on the screen in a visual way. Warping starts as a 4-point rectangle, that is superimposed on the camera image:
In the 3D workflow, a pre-warping has been done already, so the result is not (or less) influenced by the position of the camera in relation to the projection surface.
Warping Tools
The warping is mainly a point-and-click workflow. Several tools help to achive this task.
Warping Toolbar
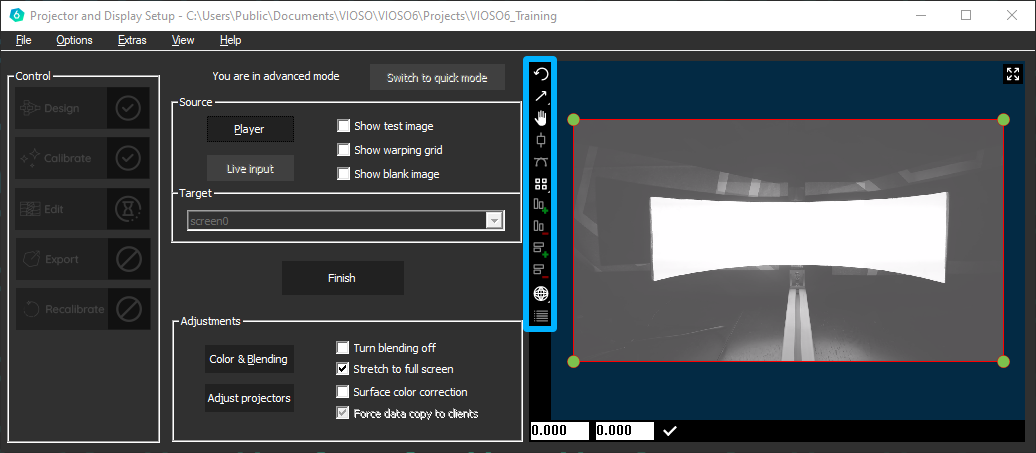
![]()
Undo (CTRL+Z) Undo an action. If you want to undo multiple actions, click multiple times
CTRL+Z
CTRL+Y
![]()
![]()
Toggle scaling / deformation mode Scale or deform one point or all points
![]()
![]()
Toggle pan / move mode Pan the entire working area or move the entire warping grid
INS
![]()
Toggle line grippers Inserts a gripper between warping points moves a vertex between two points
F2
![]()
Toggle tangents Adds a tangent to the selected point. Tangents let you adjust the curvature in case of bicubic warping
F3
![]()
Keyboard fine or coarse points Use the arrow buttons on the keyboard to move a point, small or wider spaces
F4
![]()
More columns Adds a vertical column
F6
![]()
Less columns Erases a vertical column
F5
![]()
More rows Adds a horizontal row
F8
![]()
Less rows Erases a horizontal row
F7
![]()
![]()
Toggle linear/bicubic interpolation Linear: warping is based on straight lines between points Bicubic: warping is following a curved path between points
![]()
Show undo stack
Displays a list of warping modifications, go back to a past point in your warp

Warping Context Menu
The warping area also contains a context menu that is available by right-clicking on the preview screen.

4-Point Warping / Keystoning
A typical warping and mapping task is to align a misaligned projected image to a flat surface. The very basic usage of the warping tool, therefore, consists of a 4-point warping where each corner is handled accordingly.
To get a proper linearity toggle the keystone rect feature:
Before starting a 4-Point Warping, right click on the warping grid and select interpolation method - keystone rect

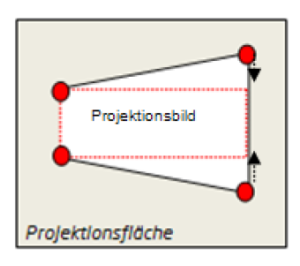
Case 1
The sides of the projected image are different lengths, e.g. projectors are angled laterally. Drag the red corners to the smallest size of the projected image.
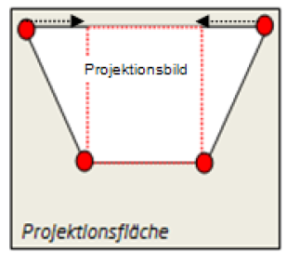
Case 2
The upper and lower sides of the projected image are different lengths, e.g. projectors are tilted vertically. Drag the red corners with the mouse in order to straighten the sides.
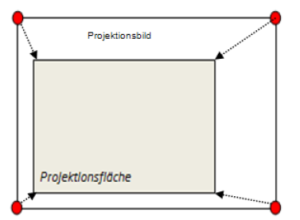
Case 3
The projected image is larger than the projection surface, e.g. projectors are too far away from the surface. Drag the red corners to the size of the projection surface using the mouse.
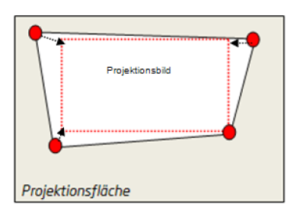
Case 4
All 4 sides of the projected image are different lengths, e.g. projectors are tilted laterally and vertically. Drag the red corners as shown in the illustration.
Arbitrary Warping
In addition to the 4-point warping functionality, the warping feature supports nearly unlimited complexity of screen shaping and content mapping. By increasing the number of control points, complex warping grids can be established.

Right-click anywhere on the warping area. The context menu is displayed. It contains the entries Grid Colums and Grid Rows, as well as the interpolation method.
Grid columns and rows: Use this function to insert warping points on the horizontal and vertical axises. Use also the tools from the warping toolbar to increase/decrease the number of columns.
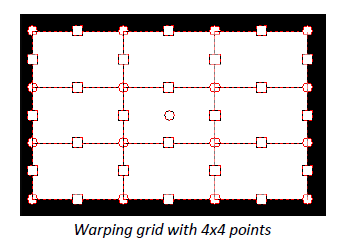
Interpolation method: Here you switch between linear and cubic support point interpolation. Linear interpolation is suitable for corners, edges, etc., while cubic interpolation is suitable for rounded surfaces. Cubic interpolation is the default.
Load/Save: Use thise features to save the current warping into a file (*.vc). Such a saved warping can be applied any time on the same calibration or another calibration.
Last updated