> For the complete documentation index, see [llms.txt](https://docs.vioso.com/llms.txt). Markdown versions of documentation pages are available by appending `.md` to page URLs; this page is available as [Markdown](https://docs.vioso.com/integration/real-time-engines/middlevr.md).
# MiddleVR
[MiddleVR](https://www.middlevr.com) is a Unity plugin designed to enable the deployment of Unity applications to VR systems such as Walls, CAVEs, and other cluster rendering systems.
This guide shows you how to integrate your VIOSO projection calibration into MiddleVR.
### 1. In VIOSO
You can use either [Project ](/start/project-mode.md)or [Free ](/start/free-mode.md)mode for performing a 3D calibration.
* Export your calibration in the **VWF** format with **3D**.
* Create an **.ini** file for each display in the format below. You only need to change `calibFile`path (exported mapping from VIOSO), `[Channel_Name]` (of your choice) and `calibIndex` :
[default]
logLevel=2
bLogClear=0 ;clear log file on start
base=[1000,0,0,0; 0,1000,0,0; 0,0,1000,0; 0,0,0,1] ; frontal cam left handed, row major, most DX
near=0.15 ; the minimum rendering distance, all faces closer than that are culled
far=20000 ; the maximum rendering disctance, all faces futher than that are culled
bTurnWithView=0 ; set to true, if moving platform alas world turns with view direction
bicubic=0 ; set to true to enhance sampling acuracy, will use up some extra GPU
calibFile=C:\Users\Public\Documents\VIOSO\VIOSOPlayer\Export\MyCalib.vwf
autoViewC=1 ;widen FoV to cover a range of autoViewC * screen
bAutoView=1 ;overwrites screen fov and dir
[Channel_1]
calibIndex=0
### 2. in Middle VR 2.1+
> You can also find these steps in the MiddleVR Documentation
>
>
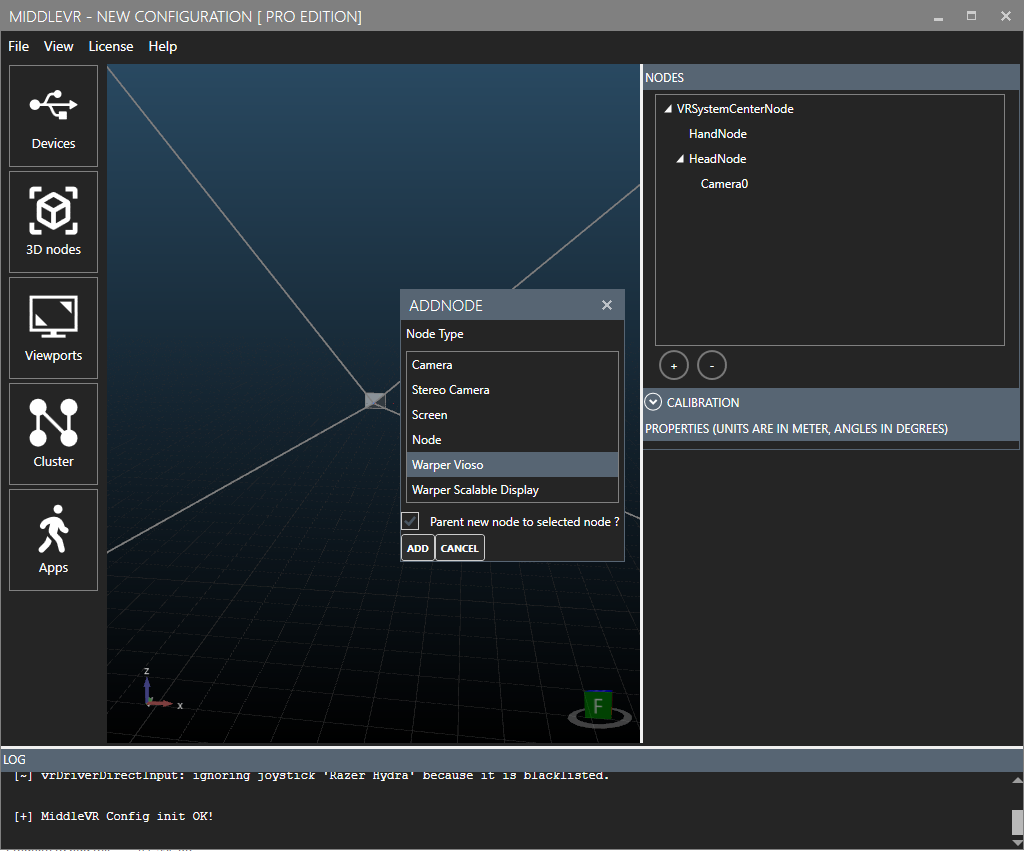
1. **in 3D nodes:** Start by adding a new Vioso Warper
 2. Enter the configuration file and channel name. You can find a template of a .ini file in `MiddleVR2/data/Vioso_MiddleVR_Template.ini`\

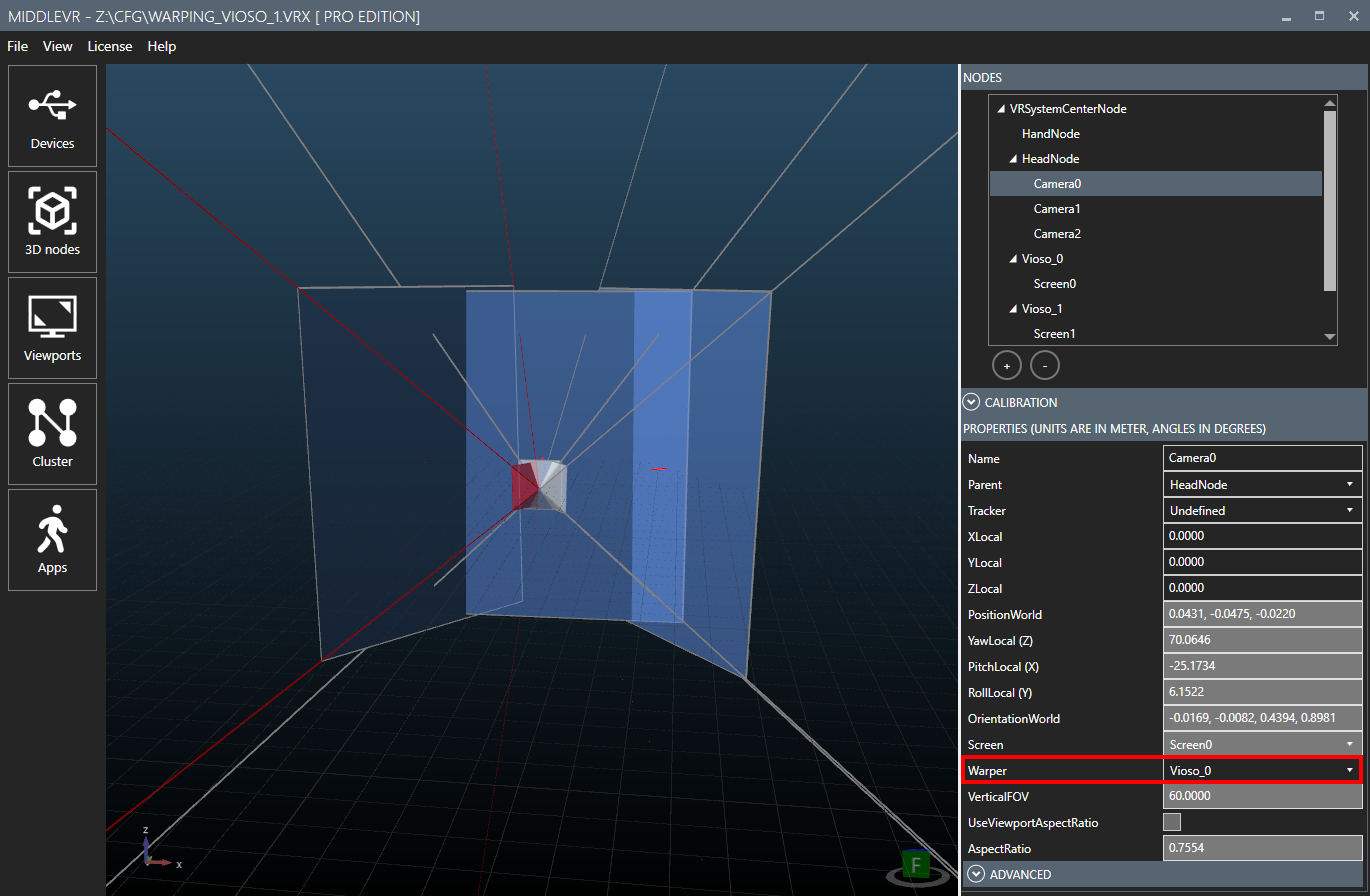
3. Assign the warper to a Camera\
4. Your VIOSO calibration is now integrated.
* Go back to the **APPS** tab and click on **RUN**.
### 3. Middle VR 2.0 (Legacy)
> For older versions of MVR, please follow our old helpdesk doc.
### 3. Troubleshooting
* In the Displays section, make sure the Window Mode is set to **Compositor** or **Proxy**
* Check the VIOSO log file here: `C:\Users\[YourUserName]\AppData\Local\Temp\MiddleVR\MiddleVR_2023-06-29\MiddleVR_Vioso_1.log`
#### Field of view adjustment
Moving the camera far away from the screen can result in black borders appearing around the screen. To fix this, you can adjust the field of view coverage by increasing the `autoViewC` variable in the **.ini** files until you get no visible black borders on the edges.
#### Multi-Cluster Setup
To run middleVR on several clusters with a VIOSO calibration make sure you take into consideration these measures:
* Calibration files **(.vwf)** and configuration files **(.ini)** must be available on all clusters with the same path. It is recommended to use local drives instead of a common network drive for better performance.
* Assign a viewport to every cluster. In case one cluster node is not part of the projection calibration, simply create a standard screen and camera for it in the **3D nodes** tab.
* Follow the [cluster configuration guide](https://www.middlevr.com/2/doc/current/MiddleVR_UserGuide.html#cfg_cluster) from middleVR for the initial setup of your multi-cluster system.
2. Enter the configuration file and channel name. You can find a template of a .ini file in `MiddleVR2/data/Vioso_MiddleVR_Template.ini`\

3. Assign the warper to a Camera\

4. Your VIOSO calibration is now integrated.
* Go back to the **APPS** tab and click on **RUN**.
### 3. Middle VR 2.0 (Legacy)
> For older versions of MVR, please follow our old helpdesk doc.
### 3. Troubleshooting
* In the Displays section, make sure the Window Mode is set to **Compositor** or **Proxy**
* Check the VIOSO log file here: `C:\Users\[YourUserName]\AppData\Local\Temp\MiddleVR\MiddleVR_2023-06-29\MiddleVR_Vioso_1.log`
#### Field of view adjustment
Moving the camera far away from the screen can result in black borders appearing around the screen. To fix this, you can adjust the field of view coverage by increasing the `autoViewC` variable in the **.ini** files until you get no visible black borders on the edges.
#### Multi-Cluster Setup
To run middleVR on several clusters with a VIOSO calibration make sure you take into consideration these measures:
* Calibration files **(.vwf)** and configuration files **(.ini)** must be available on all clusters with the same path. It is recommended to use local drives instead of a common network drive for better performance.
* Assign a viewport to every cluster. In case one cluster node is not part of the projection calibration, simply create a standard screen and camera for it in the **3D nodes** tab.
* Follow the [cluster configuration guide](https://www.middlevr.com/2/doc/current/MiddleVR_UserGuide.html#cfg_cluster) from middleVR for the initial setup of your multi-cluster system.